Ribbing Round Corners
Posted on
I've been meaning to post this for a very long time, from back when I was working on my Sandshore cardigan. I really enjoy trying out new things to improve the look or add a challenge to some of my projects and this was a new technique that I wanted to learn so i'm sharing it with you now.
Sandshore is a beautiful summer cardigan designed by Alicia Plummer , I knit it as part of The Ultimate KAL in the Plum Dandi Ravelry group. I also knit an Ease for that Knit along. Those were the days where I had lots more knitting time and Jumpers were my go to. I still want to knit all the jumpers but my knitting time at the moment no longer allows. I will crack on the project that i've been planning for about a year now. I have the most beautiful yarn from Triskelion for it, but i digress.
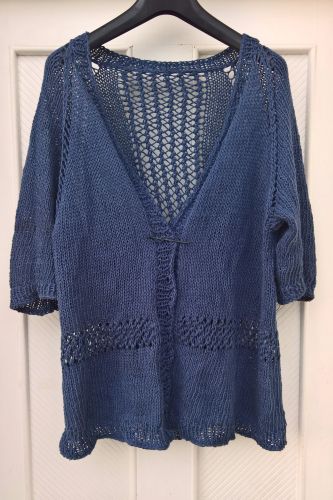
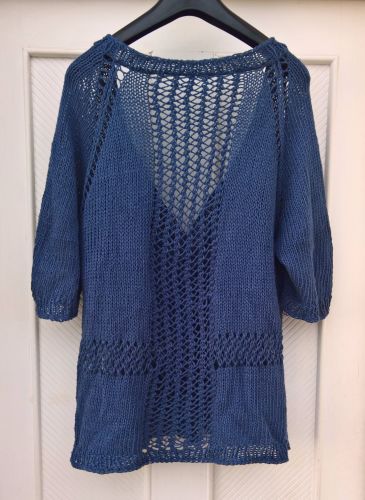
Whilst knitting my Sandshore Cardigan, as seen below knitted using Drops Bomull-lin in dark blue, I became very interested in the idea of knitting the ribbing for the whole jumper in one go, as I like the idea of ribbing that flows rather than stops and starts. So I went ahunting for any information about doing it. There wasn't that much out there but I did find an ehow article that this post is adapted from to better describe knitting the ribbing.


Requires
- Really long cable - I use circular interchangeables and I believe that I used a 200cm cable.
- Cardigan that requires ribbing on all edges.
Step By Step instructions - Bear in mind you will be knitting this in Rib, so K1, P1 or whichever varieation called for in your pattern.
- Pick up all your stitches around the edge of the cardigan, Neck, Lapels, and bottom. You will want to pick up one stitch for each row or column of stitching and join in the round,
- Knit one round across all your stitches making sure to place a stitch marker at the centre of each corner.
- Knit in your ribbing pattern the next round until you reach 1st before your first marker, Knit into the front and back of that stitch, slip marker, Knit into the front and back of the next stitch. Continue repeating this method around the whole round of stitches, Increasing each side of every corner marker.
- Knit as many rounds as needed/ required by your pattern for ribbing, following the technique as outlined in round 3.
- Bind off when the border reaches the desired height. you're all done!
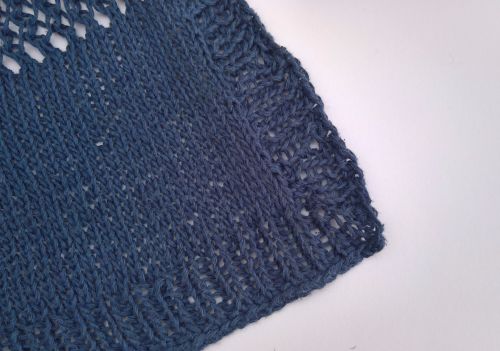
Here's a close up of the details around the edge of one of the corners. 
Incidentally this wasn't the only change I made to the pattern, it's a habit of mine to modify most things, to either fit my shape or work better for the way I wear clothes. Some of the modifications made here are to centre the back lace panel as it was offset (which is something I knew would bug me), and to increase the slope of the front to allow for proper closure. So I currently have buttonholes at the front but in the two years since I made this i've not found any buttons, so if you have any suggestions, pop them down below :D
Please let me know if you use this technique and if you have any thoughts. Happy Crafting!
Add a comment: